How to Draw Catz Portraits
As the hexers have worked out over the years, the Catz in our favorite Petz
games are all based on circles grouped and lined up in such a way to make a
cute kitty. The building block to being able to draw a portrait is
to be able to draw circles.
You can use stencils, templates, or a
compass, if you want, to draw the circles. If you want to freehand the circles
like I do in this tutorial this video by Emmy Kalia:
How to Draw a Circle Freehand - Beginner Drawing Techniques
Step 1:
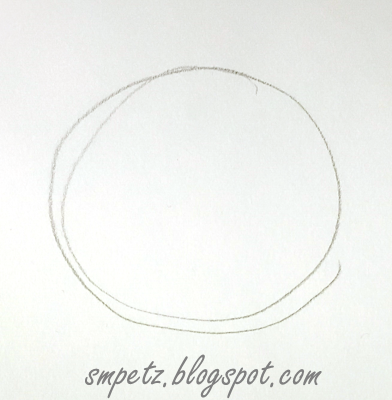
Draw a large-ish Circle. I recommend no smaller than 1 1/2 inches
across to start, it's better to start a bit bigger.
Step 2:
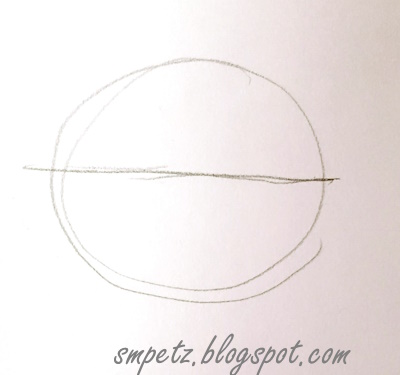
Lightly draw a line across the circle splitting it in roughly half.
Step 3:
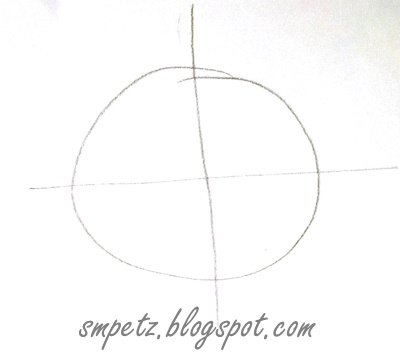
Lightly draw a line splitting the circle in roughly half vertically.
Please Note:
Steps 2 and 3 are reversible. Do them in the order that feels more
comfortable to you. The point is to have your circle roughly looking like a
pie cut into 4 even pieces at this point.
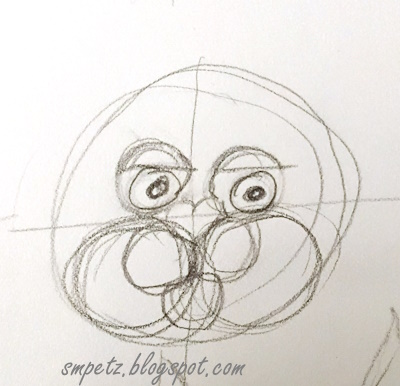
Step 4:
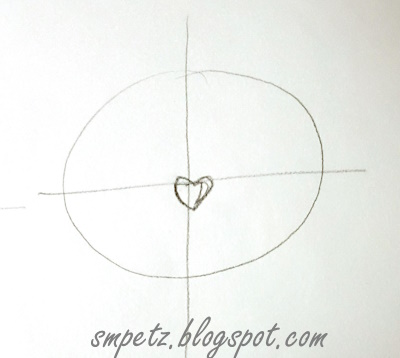
Where cross in the center of the circle where the two lines meet is where the
center of your nose should set. I'm drawing a Calico for this
tutorial, so let's draw a heart!
Step 5:
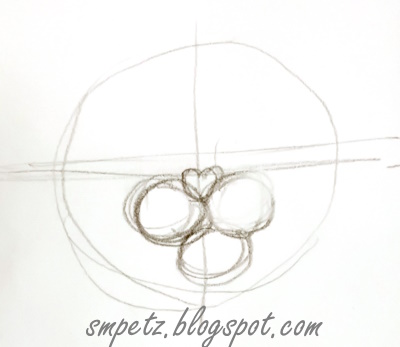
It's easier to place the eyes, if the muzzle is done. So lets do
that first!
The important bit on this step is that the two circles
must touch the nose, and just under the nose they need to touch each other.
The
lower jaw nestles in the triangle created by the muzzle circles.
Step 6:
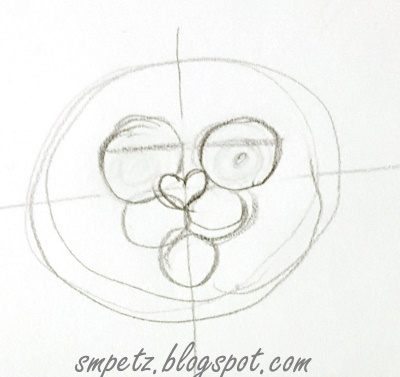
The eyes do not touch in the center in the front view on a
Calico! (Mind the gap, or lack their of, in the other breeds of Catz.)
However the eyes must touch the top of the muzzle. I found the spacing part
tricky, so expect a few tries to get it.
Step 7:
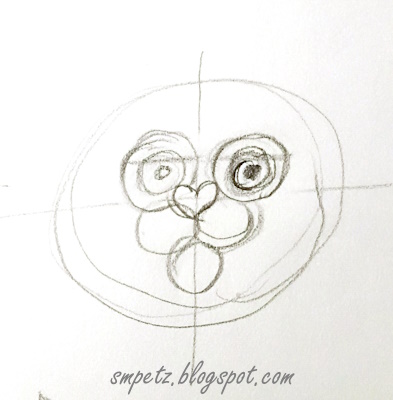
The Irises of the eyes need to be in
roughly the same spot on both eyes, or your catz will look cross
eyed. I find it easier to draw the colored part first then the
dark pupil. Someone else may find it easier to do it the other way round and
draw the pupil first, then the colored Iris around it.
Step 8:
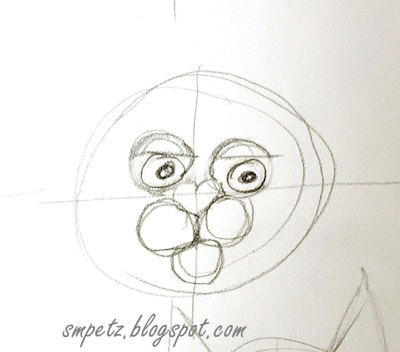
Part of the beauty starting with drawing a calico? The eye
lids don't have to match! Draw the line where you want the eyelid.
Don't be afraid to cross your iris to get the expression that you want. Be sure
to erase the iris and pupil where they're under the eye lid.
Step 9:
On calico's the cheeks aren't that visible, but they're
there. The reason for drawing everything so far first is so that you can line
up the cheeks.
The cheeks line up behind the muzzle, under the
eyes, and behind the jaw. A Calico's do not stick that far out of the side of
the head, unlike say a Scottish fold's. It's best to draw them in
anyway, as a lot of the calico's face patches line up with the edges of these
circles.
Step 10:
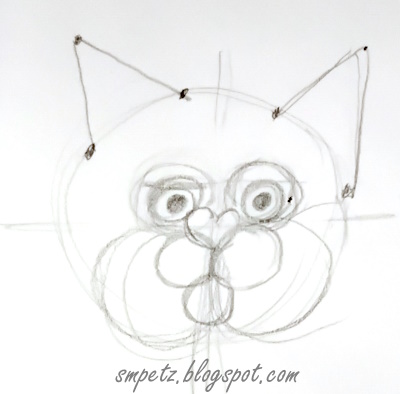
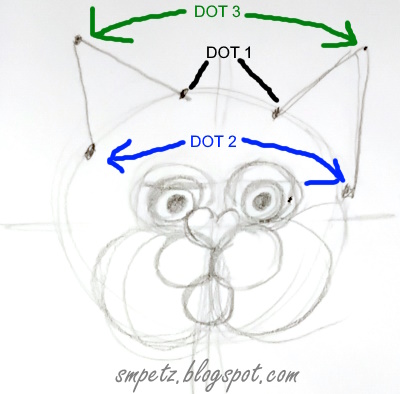
The ears are basically crooked triangles. Place dots at
the following two points to start your ears.
The innermost line of both
ears lines up with the center of the eyeball on a Calico (Dot 1).
The outer most line is lower, ending near the top quarter of the eye
(Dot 2).
The Tippy Top of the ear is positioned above and slightly to the
inside of Dot 2 (see Dot 3).
Once you have all three dots in place, draw a
straight line to create the outside of the ear.
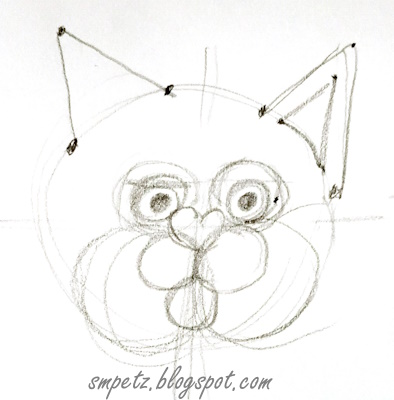
Step 11:
The inside of the ear. Draw a dot just down from top dot, inside the ear,
and two just inside the bottom of the ear (be sure to not go below the curve of
the head). Connect the dots, for the sides of the inside of the ear, and follow
the curve of the head for the bottom of the triangle.
Step 12:
To clean up, or not to clean up... The choice is up to you.
This next step you have a bit of wiggle room as it's mostly a
choice of preference. It's up to you if you want to erase the stray
lines that are on your drawing, or leave them in and color over them.
Just be sure that if you decide to erase the strays that you check, and make
sure, the eraser hasn't dried out on another piece of paper. A dried out
eraser at this stage of the game has ended in me in tears.( Then digging out
the tracing paper, to try and salvage my picture.
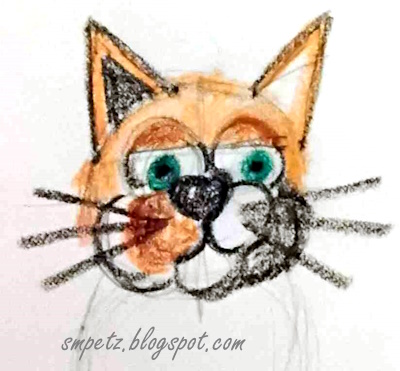
Now that you're this far all that's left is to color your kitty how you want!
Either copy one from your game, or make up colors on your own 💜 I suggest
starting with a 'basic' calico, without a lot of the busier textures and
work your way up.
Going into detail on how to color your kitty
is beyond what I have room for in this tutorial. Perhaps a future one can cover
that.
Don't forget to add your kitties whiskers during this step! I suggest if they're dark ones make them one of the last things you color in.
That way if your kitty is light colored the darker whiskers won't smear as you try to color around them. (Yes... I've tried. Coloring around them doesn't work too well in real media!)
Log in to post a comment.
Comments
No comments yet. Be the first to say something!